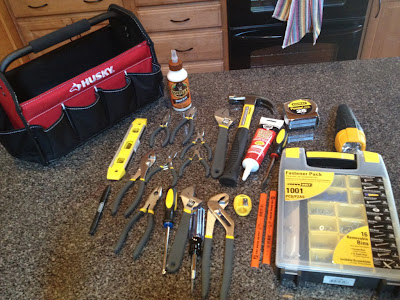
 My favorite tool out of the entire bag is this mini flat-headed gripper thingy. I think most people call it "pliers". Hahaha! I am just kidding, of course. Back in the day (and by this I mean last month) I would have called it a mini flat-headed gripper thingy but now in my more mature home-owning days I refer to it by its actual name - PLI-ERS.
  Now, regarding the plant, I am no green-thumb. However, this little beauty and I are, so far, getting along just fine. I keep sunlight on her and give her some water a couple times a week. She has a glorious little spot on my kitchen counter, right across the way from a window. So, H family, thank you, thank you, thank you, thank you, THANK YOU!!!
And now back to our regular programming...
Don't over-patch like me either. I learned that over-patching the whole or crack may seem like a sensible idea at first but when you have to sand it, it becomes a real hassle:
 |
| WAY to much Plaster Patching compound! |
I started sanding my walls down with a 3M hand sander using 220 sandpaper:
I also kept the cover on the floor and added plastic over the entryway into my living room and a mask to my face. The mask is so important because if you don't wear it you will breath in the dust. Then your mouth, throat and nose will get really dry and yucky and you will not be able to breath well (so I heard):
As expected a lot of plaster and compound came snowing down around my feet like a winter blizzard:
Alright, so it wasn't a winter blizzard exactly...more like flurries but it WAS all over the foyer trim. The floor cover was pretty much useless as a dust catcher, at least for the edges. The plastic did a great job keep the dust out of the living room so I would definitely recommend that.
The next thing I used (and am currently still using) was a dry-vac / sander combo. The dry-vac sucks up most of the dust and debris before it can fall. The dry-vac also easily vacuums up any messes you make, like above:

Let me tell you how much faster this is and how much cleaner! The foyer is fully sanded and I am just about to get up and go finish the stairwells and upstairs hallway. The picture to left is a piece of my newly smooooootthh wall. I know you can't tell by looking so just close you eyes, rub your fingers on the computer screen and think, "Stephie's sanded wall, Stephie's sanded wall."
Foyer, foyer, foyer....when will I ever finish you?? I am hoping you will be caulked and ready for primer/paint by tomorrow at the latest. I am sick of typing f-o-y-e and r.
While you await the end of the rest of the pre-paint foyer blog enjoy a very cute dancing kitten here.


No comments:
Post a Comment
I love comments! Thanks!!