Prior to the closing of my house I did take on a little rehab project on a rocking chair frame I bought at a garage sale for $10:
I saw the beauty in this little frame and thought to myself, "Well, if I screw this up then I only wasted $10.00". So, as a test of skill, confidence, and patience I took on this little project. I used YHL Painting Furniture tips for the frame itself and Kenvue2 YouTube video for the reupholstering of the seat. I also had my "tutor", my soon to be ex-hubby, who I will call B on this blog. He taught me how to use a Dremel Multi-Max for sanding, what the numbers on the sandpaper mean, how to use a circular saw, and taught me how to clean the wood properly with mineral spirits and tack cloth, among other things.
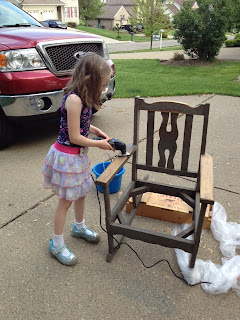
First things first...we decided that based on the roughness of the wood and the bumpiness of the old paint/finish that the chair needed to be sanded down to the original wood. Using the Dremel Multi-Max sander with 50 and 60 sandpaper I sanded the chair down to the wood - B and my daughter helped too - the first to teach and advise, the second because, "it's fun!"
 |
| My 7yr old sanding the arms of the rocking chair |
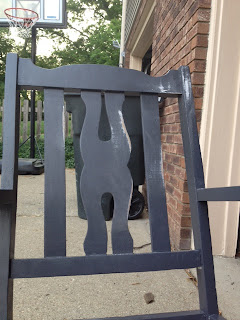
My chair was now nice and smooooooooooth. I put two THIN coats of an oil-based primer, per YHL advise, and then two coats of latex paint.
The color I bought was called "Charcoal Black" but this came out more of a dark grey than black. So then I had to decide if I could live with this color or not. Hmmmm....
The next step was to build a seat! I started out with a piece of plywood, approximately 20" x 20". I used an old school angle finder and cut the wood with a circular saw. Let me tell you how much fun it is to use a circular saw! It gives you the same type of pleasure as eating awesome chocolate or punching something when you are pissed. So satisfying!! Anyway, here is the cut plywood in the chair:
*NOTE: We noticed that when we flipped the plywood over it didn't fit quite right. Ensure that you are placing it in based on the angles cut for those specific sides!
In addition to the plywood I also added chair padding. Now the fun part!! What type of fabric should I put on the seat?? I must have been in Joann's Fabric for 2 solid hours trying to decided on a fabric. I even texted my mom! My mom told me that I should use upholstery fabric (fantastic tip!) and then helped me narrow down my favorites to four:


Ho, hum, ho, hum....which one??? I finally picked one and using the Youtube video referenced above and a heavy duty staple gun I put the seat together. I chose the black/gray/white snow flakey pattern...
...but it didn't really go with my chair color! And I had drips that made bumps that captured my attention and I just couldn't be happy with the chair yet. I pulled a black stool over to compare my "charcoal black" with regular plain black and I knew, right then, that I had to change the color!
So, I decided to sand down the bumps and repaint the chair black-black and not some crazy version of black that is really gray:
I added a two little coats of primer to the newly sanded areas and repainted the whole chair black, carefully watching for annoying little drips. My BLACK chair looked awesome!!
I laid my new seat in the frame....
I just have to screw it down underneath - otherwise, this project is done! Yah me!!


