Thursday, July 12, 2012

House 1 - Stephie 0

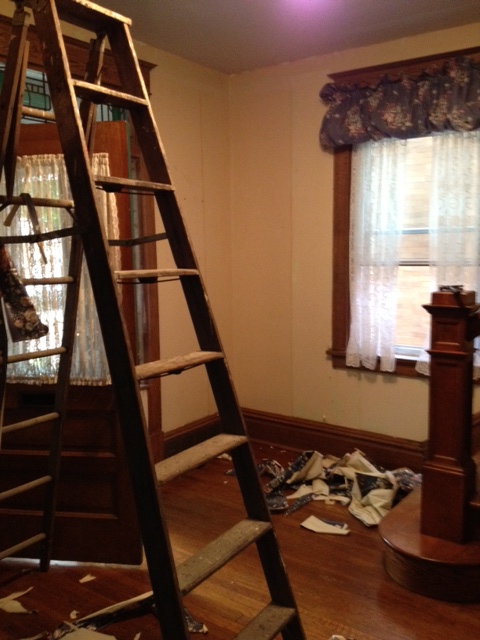
Let's cut to the chase. I hired someone to finish my foyer. I couldn't stand it anymore and the walls just kept on going all the way to the third floor!  So, my "foyer guy" is going to complete all the walls from the entrance up the the third floor and the ceilings too! So far he has finished removing the wallpaper adhesive from the walls (I thought I did a great job but it turns out that I left a bunch of paste behind - lesson # 1), removed cracks and bulging lines in the plaster (cut them out and fill them in; applying plaster OVER the bulging lines only makes them more bulgier - lesson # 2), skim coating and more skim coating, oil primer (oil primer first seals the walls - follow with latex primer - lesson # 3), fixed, primed and painted the ceiling. 
There were some HUGE bulging lines that had to be
removed, refilled, and smoothed
More cut out areas to be repaired


The WORST area - glad I didn't try to fix
this myself!
Here are some interesting things that have happened in the last couple weeks:

1. The job was supposed to be finished by July 4th. This is the day my mom flew into town and I really wanted her to see my new shiny foyer in all its glory. Instead she walked into a cloud of dust and the foyer was better described as disrobed, in the buff, bare, stripped, or exposed.  It was still down to the plaster (or old paint) and my beautiful wood floors were covered in an inch of plaster dust.

"Uh, yah, so welcome to my construction site Mom! Please excuse our dust - we are making improvements to this area!" Note that todays date is the 12th...THE 12TH! My walls are still not done.  I just hope that my Mom gets to see a finished product before she leaves in 6 days.Sigh...

2. My foyer guy's employee "borrowed" his van one day. The foyer guy had to have his auntie drive him around from bar, to friend, to bar looking for the missing employee and van.  He found it at 2pm.   The van borrower hasn't been back.

3. My foyer guy's 2nd employee just stopped showing up altogether.  What is with these guys??

4. My dog hates strangers, especially if they are men, super especially if they have dark skin. Ugh, my dog is a racist (he is a rescue so maybe he has some traumatic history there). Anyway, he is all of one and 1/2 feet tall but acts like he is the biggest, baddest doggie on the block.  He gets a killer mohawk kicking, bares his teeth acts like he going to rip out the throat of every man (or manly woman) that enters the house or is on the porch...or is on the sidewalk looking at the house...or just happen to be walking by.  This has caused some very tense and LOUD moments times during this little project.


What a wuss!


My big, bad doggie


5. Blisters are forming in the primer and the ceiling paint. This is baffling too everyone involved.  Is my house to hot (I have NO air conditioning and its summer)? Is there something on the wall that is interacting? Is there moisture? Is there air coming through?  If you have any thoughts on this please comment below!

That is all I have for now. I post more pictures later.  Hopefully BEFORE the 18th. Ha!

Saturday, June 23, 2012

More Foyer (Geez, when is this going to get done??)

First before I start on my foyer again I would like to send out a BIG, HUGE, GINORMOUS thank you to the H Family for my housewarming gifts!  Best housewarming gifts EVER! 


My favorite tool out of the entire bag is this mini flat-headed gripper thingy.  I think most people call it "pliers".  Hahaha!  I am just kidding, of course.  Back in the day (and by this I mean last month) I would have called it a mini flat-headed gripper thingy but now in my more mature home-owning days I refer to it by its actual name - PLI-ERS. 
Now, regarding the plant, I am no green-thumb. However, this little beauty and I are, so far, getting along just fine. I keep sunlight on her and give her some water a couple times a week. She has a glorious little spot on my kitchen counter, right across the way from a window.   So, H family, thank you, thank you, thank you, thank you, THANK YOU!!!

And now back to our regular programming...

My next job in the foyer (which I think I mentioned last post?) was to patch holes and sand the walls. Anything on the walls, like rough spots or holes, etc, will really show when I paint. So I have patched the holes and covered the cracked areas in the plaster with Patching Plaster and a taping knife.  One good tip (from a flustered B) is to NOT LET THE COMPOUND DRY ON THE KNIFE. Also, don't rinse any of this gunk down your sink.  It will, apparently, dry in your pipes:


Don't over-patch like me either.  I learned that over-patching the whole or crack may seem like a sensible idea at first but when you have to sand it, it becomes a real hassle:   
                                                                      
WAY to much Plaster Patching compound!

I started sanding my walls down with a 3M hand sander using 220 sandpaper:


I also kept the cover on the floor and added plastic over the entryway into my living room and a mask to my face.  The mask is so important because if you don't wear it you will breath in the dust. Then your mouth, throat and nose will get really dry and yucky and you will not be able to breath well (so I heard):


 As expected a lot of plaster and compound came snowing down around my feet like a winter blizzard:


Alright, so it wasn't a winter blizzard exactly...more like flurries but it WAS all over the foyer trim. The floor cover was pretty much useless as a dust catcher, at least for the edges.  The plastic did a great job keep the dust out of the living room so I would definitely recommend that. 

The next thing I used (and am currently still using) was a dry-vac / sander combo.  The dry-vac sucks up most of the dust and debris before it can fall. The dry-vac also easily vacuums up any messes you make, like above:


Let me tell you how much faster this is and how much cleaner!  The foyer is fully sanded and I am just about to get up and go finish the stairwells and upstairs hallway.  The picture to left is a piece of my newly smooooootthh wall.  I know you can't tell by looking so just close you eyes, rub your fingers on the computer screen and think, "Stephie's sanded wall, Stephie's sanded wall."

Foyer, foyer, foyer....when will I ever finish you?? I am hoping you will be caulked and ready for primer/paint by tomorrow at the latest. I am sick of typing f-o-y-e and r.

While you await the end of the rest of the pre-paint foyer blog enjoy a very cute dancing kitten here.

Thursday, June 7, 2012

Follow-up!

Hi, blog readers!  I just wanted to follow-up my last post with quick update. That last remaining wallpaper adhesive that was taunting me as I fell to my death is G-O-N-E.  Yeah, so there!  My nifty new ladder allowed me to kill that last little bit!  Though, I am pretty sure I am not using the stair ladder function correctly yet.  Hmmm....I guess I will pull those directions out after all!

Anywho, B pointed out that if you continue up that same wall you immediatly run into wallpaper border in the rest of the stairwell and in the hallway at the top of the stairs. This has also now become part of the "foyer" project.  The border, like the rest of the wallpaper in the house, is floral!  My friend asked me why there was bedroom paint and border in the hallway.  I did not have a good answer to that! Oh, lordie...


Awesome Hallway Border

I just don't understand the obsession with flowered wallpaper in the house!  I still have two whole rooms that are covered in flower wallpaper that we haven't even got to yet!  It's like Hallmark, new baby scent, kittens and a bunch of other cutesy stuff got together and decorated this house!  If I never see another version of floral wallpaper again, it will be too soon.

Anyway, after I finish taking this horrible border down we will start prepping all the "foyer" walls for new paint!  Reminder: "Foyer" now includes the actual foyer, the stairwell, and the 2nd floor hallway.  Let me know in the comments if you think I should paint with a very neutral, bright color, like egg-shell or pure whate through out the "foyer" or if I should go with something else.  Maybe a blast of color?  Maybe a stronger "neutral"? 

Lastly,  I just want to say that I really enjoy the creative side of this blog writing WAY more than the instructional part. My new plan of action is to to just enjoy this output (and hopefully some input soon) and go with the flow.  No more instructional stuff from me!  Just an entertaining summary of what's going on, what I am working on, stupid, idiotic stuff I pull, and, of course, final outcomes!!

I hope you enjoy what you read!!

Tuesday, June 5, 2012

Someone call OSHA! This blogger has lost her mind!

So, here is the portion of my foyer job that I share some of my stupidity with you all.  We are this close to removing all the wallpaper and adhesive from the foyer and attached walls in the stair well. THIS CLOSE. You can see that last little remaining section that is to high to reach...Grrrr!


To fully understand what I have done you have to know that my stairs have two entry areas that meet at the first landing. It is about 12.5 ft above the lowest stair and about 7 or 8 fee from the landing.


My plan of attack consisted of placing a regular, a-frame, two-sided ladder on the landing and strrrrrreeeettttcccchhhh as far as I could to reach the top. The ladder barely fit on the landing; the small feet on the back were fully on the landing but the larger front feet were only about half way. Although, I could reach higher than before I still couldn't stretch my body far enough to get to the top. I needed to revise this idea.  I decided that it would be best to utilize both the precariously balanced ladder AND the top of the door frame, stretching up even further to get to that last little bit. I drew this great picture for you so that you can fully visualize this mighty plan of mine:

This is SUCH a bad idea!
Who wants to guess what happened next?  DING! DING! DING! We have a winnah!  Yes, my massive stretch to the left pushed the ladder just enough to the right and I received a free flying lesson until gravity took over:

I landed on my left side leaving multiple bruises from my thigh to my arm but did not damage my head or bones. B had raced around to ensure I was OK, took away my scrapper tool (which I am glad I didn't land on), and told me how lucky I was and that I should be on my way to the ER.  After breathing through the pain and the shock I finally got up and started to place my ill-balanced ladder back on the landing.  B asked me if I was "F*****G CRAZY" because I planned on getting right back up that ladder.   I was honestly weighing the choice between finishing the wallpaper removal job in that area and my chances of falling again. I think at that point B's eyes popped out of his head along with a vein and he stomped out completely exasperated at me.

To make a long story short I went to Lowe's and bought a new ladder.  Hmppff!

OK, I think it actually does a lot of cool things but just don't tell B that!

Monday, June 4, 2012

Foyer 1

This is my new foyer.  It is dark, flowery and SO not me !  Not only does it have ugly wallpaper but it also comes with matching valances and lace curtains! If I was 80 years old I would probably love it! But, I am not so it needs to be changed!


Under this beauuutiful wallpaper there is plaster.  I was honestly worried about the plaster and pictured it all coming down around me in chunky, dusty pieces. So I read up on removing plaster from the Internet. I read an article on This Old House, which tells you how to use diluted wallpaper stripper and water and a pump sprayer. They followed up with a 2nd method which was to use a steamer. I read a bunch of DIYer feedback in different sites and saw DIF over and over again. We also had to figure out how to protect the beautiful wood stairs, floors and window frames.  Our first go-round starts here:

First attempt - The darker yellow is old wallpaper
 adhesive while the light beige is the plaster underneath.
My little DIYer!
Our brilliant thought was to cover the floor with plastic and cover the wood with some butcher-like paper taping down the edges with painters tape. We went with the diluted solution in the pump sprayer suggestion.  Here is what we learned:

1. Liquid soaks right through paper (duh)
2. Liquid remains on plastic and anything else that is set on said plastic (double duh) which then gets on any that the first thing sits on.
3. Liquid removes painters tape in record time (doh!)
4. Pump bottles meant for spraying lawns with chemicals has a large spray radius. I would not recommend this product for inside the house.


Here is the same wall with the wallpaper and adhesive removed down to the plaster. So, now we knew we CAN do this...we just needed a cleaner way to do it!


The end of day one! Most of the dark blue flower wallpaper is down only the adhesive and backing to remove.
More to come!

Tuesday, May 29, 2012

Pre-Home Closing - Rehab Rocking Chair


Prior to the closing of my house I did take on a little rehab project on a rocking chair frame I bought at a garage sale for $10:

I saw the beauty in this little frame and thought to myself, "Well, if I screw this up then I only wasted $10.00". So, as a test of skill, confidence, and patience I took on this little project. I used YHL Painting Furniture tips for the frame itself and Kenvue2 YouTube video for the reupholstering of the seat.  I also had my "tutor", my soon to be ex-hubby, who I will call B on this blog.  He taught me how to use a  Dremel Multi-Max for sanding, what the numbers on the sandpaper mean, how to use a circular saw, and taught me how to clean the wood properly with mineral spirits and tack cloth, among other things. 

SO, lets get to it!

First things first...we decided that based on the roughness of the wood and the bumpiness of the old paint/finish that the chair needed to be sanded down to the original wood.  Using the Dremel Multi-Max sander with 50 and 60 sandpaper I sanded the chair down to the wood - B and my daughter helped too - the first to teach and advise, the second because, "it's fun!"

My 7yr old sanding the arms of the rocking chair
The next step after sanding and sanding and sanding was clean up. I wiped the chair down with Mineral Spirits and then tack cloth.


My chair was now nice and smooooooooooth. I put two THIN coats of an oil-based primer, per YHL advise, and then two coats of latex paint.


The color I bought was called "Charcoal Black" but this came out more of a dark grey than black. So then I had to decide if I could live with this color or not.  Hmmmm....

The next step was to build a seat! I started out with a piece of plywood, approximately 20" x 20". I used an old school angle finder and cut the wood with a circular saw.  Let me tell you how much fun it is to use a circular saw!  It gives you the same type of pleasure as eating awesome chocolate or punching something when you are pissed. So satisfying!!  Anyway, here is the cut plywood in the chair:

*NOTE: We noticed that when we flipped the plywood over it didn't fit quite right.  Ensure that you are placing it in based on the angles cut for those specific sides!

In addition to the plywood I also added chair padding.  Now the fun part!!  What type of fabric should I put on the seat??  I must have been in Joann's Fabric for 2 solid hours trying to decided on a fabric.  I even texted my mom!  My mom told me that I should use upholstery fabric (fantastic tip!) and then helped me narrow down my favorites to four:


Ho, hum, ho, hum....which one??? I finally picked one and using the Youtube video referenced above and a heavy duty staple gun I put the seat together. I chose the black/gray/white snow flakey pattern...


...but it didn't really go with my chair color!  And I had drips that made bumps that captured my attention and I just couldn't be happy with the chair yet.  I pulled a black stool over to compare my "charcoal black" with regular plain black and I knew, right then, that I had to change the color!

So, I decided to sand down the bumps and repaint the chair black-black and not some crazy version of black that is really gray:

I added a two little coats of primer to the newly sanded areas and repainted the whole chair black, carefully watching for annoying little drips.  My BLACK chair looked awesome!!


I laid my new seat in the frame....


I just have to screw it down underneath - otherwise, this project is done! Yah me!!